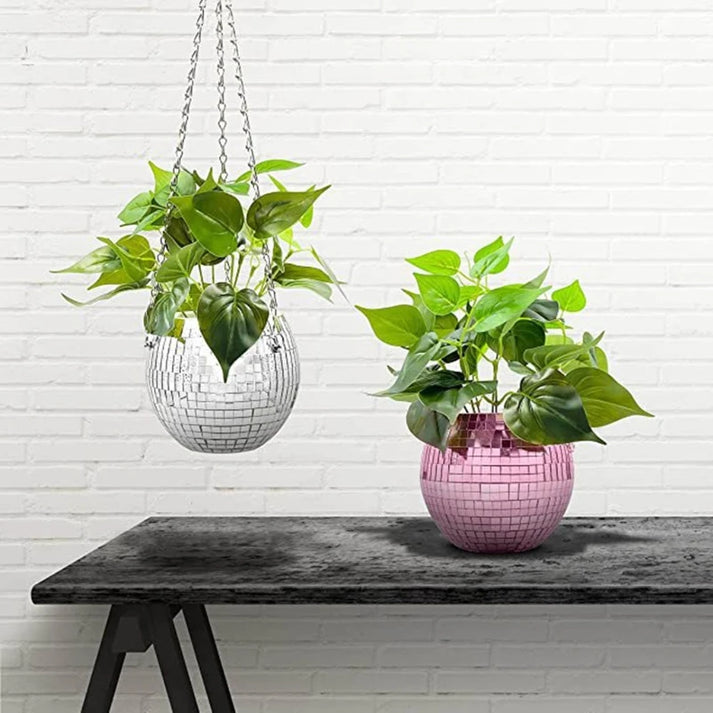
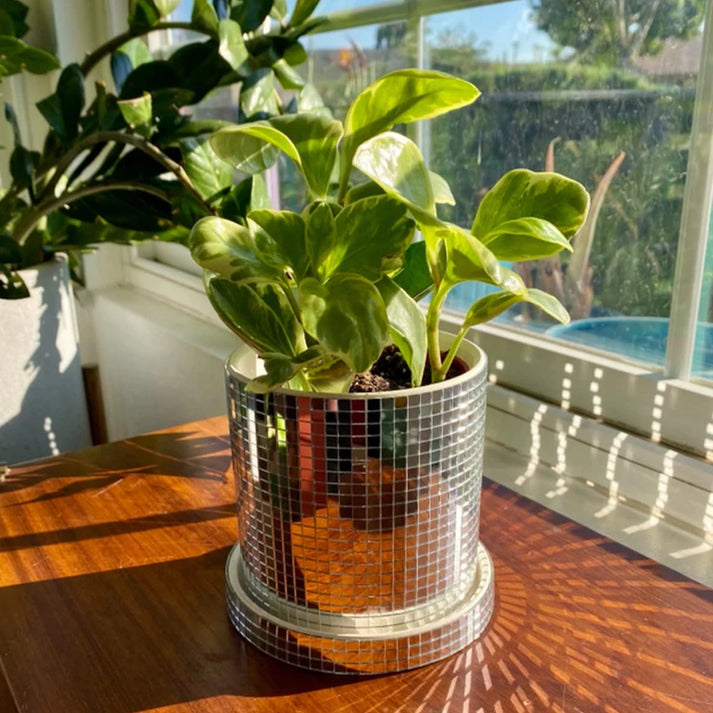
When it comes to home décor, the past often inspires the present. One such nostalgic trend making a spectacular comeback is the Disco Ball Planter.
These dazzling planters are more than just containers for your greenery; they are a statement piece, a blend of 70s disco glam and modern plant culture.
This article explores how Disco Ball Planters are revolutionizing home décor, offering a unique way to infuse life and style into living spaces. Pair them up with artificial plants and be sure to wow your guests to no end!
The Resurgence of Disco Era Aesthetics
- Tracing the Disco Influence in Modern Decor: The disco era, known for its vibrant music and flamboyant fashion, has left a lasting impact on modern interior design. Disco Ball Planters, with their mirrored surfaces and reflective glamour, are a testament to this influence, bringing a touch of retro charm to contemporary spaces.
- Why Disco Ball Planters are Gaining Popularity: The appeal of Disco Ball Planters lies in their ability to combine nostalgia with functionality. They reflect light, creating a dynamic atmosphere, and offer a creative way to display plants, appealing to both plant enthusiasts and fans of retro decor.

Check out this Mirror Disco Ball Hanging Planter in Many Colors.
Design and Variety: Exploring Disco Ball Planter Styles
- From Mini to Massive: Sizes and Shapes: These planters come in various sizes and shapes, from mini versions perfect for small succulents to larger ones that can house bigger plants, each adding a different aesthetic to the space.
- Material Matters: Glass, Ceramic, and More: While traditional disco balls are glass, planters are available in various materials like ceramics, plastic, and even eco-friendly options, catering to different tastes and environmental considerations.

Ensuring that your disco ball planter has a drainage hole will sake you a lot of headache in the future.
The Art of Placement: Maximizing Aesthetic Impact
- Indoor vs. Outdoor: Where to Hang Your Disco Ball Planter: Whether indoors or outdoors, these planters can be a striking addition. Indoors, they can be hung in living rooms or near windows where they can catch light. Outdoors, they can add sparkle to gardens or patios.
- Lighting and Reflection: Creating the Perfect Ambiance: The placement near light sources is crucial for maximizing the reflective properties of these planters. They can transform sunlight or artificial light into captivating patterns, enhancing the ambiance of any space.
Plant Pairing: Choosing the Right Greenery for Your Disco Ball
- Best Plants for Disco Ball Planters: The choice of plant is essential for the overall look. Low-maintenance plants like succulents, ferns, or ivy are popular choices, as they complement the planter's aesthetic without requiring extensive care.
- Care Tips for Ensuring Plant Health: It's important to consider the watering needs and sunlight requirements of the plants chosen. The mirrored surfaces of the planters can potentially magnify sunlight, so positioning and plant care should be adjusted accordingly.
DIY Disco Ball Planters: A Step-by-Step Guide
Creating your own Disco Ball Planter can be a fun and creative way to add a personal touch to your home décor.
Materials Needed:
- A disco ball (size of your choice)
- A sharp cutting tool (like a utility knife or a saw)
- Sandpaper or a sanding block
- Safety goggles and gloves
- A marker or tape for marking the cutting line
- Potting soil (optional, depending on the type of plant)
- Plants or seeds of your choice
- Waterproof adhesive (if planning to hang the planter)
- Hanging hardware (optional)
Step 1: Preparing the Disco Ball
- Start by deciding the size of the planter opening. Mark the area on the disco ball where you wish to cut. This could be a circular opening at the top or a side cutout, depending on how you want to display your planter.
Step 2: Cutting the Disco Ball
- Wearing safety goggles and gloves, carefully cut along the marked line using your cutting tool. Take your time to ensure a smooth cut. The mirror tiles can be sharp, so it's important to handle them carefully.
Step 3: Smoothing the Edges
- Once you’ve cut out the opening, use sandpaper to smooth any rough edges. This step is crucial for safety and will give your planter a more finished look.
Step 4: Adding Drainage (Optional)
- If you plan to use the planter for soil-based plants, consider drilling a few small drainage holes at the bottom. This step is not necessary for air plants or plants that require minimal watering.
Step 5: Planting
- If using soil-based plants, fill the disco ball with potting soil and plant your greenery. For air plants, you can place them directly inside the ball without soil.
Step 6: Sealing and Hanging (Optional)
- If you plan to hang your planter, use a waterproof adhesive to attach hanging hardware securely. Make sure the adhesive is fully dry before hanging.
Step 7: Finding the Perfect Spot
- Choose a spot for your new Disco Ball Planter where it can catch light - this could be near a window or under a light source for maximum effect. Remember, the mirrored surfaces will reflect light, so consider the lighting in your chosen spot.
Step 8: Maintenance
- Care for your plant as usual. The unique setting of a disco ball may require slightly different watering schedules, especially if the planter is indoors.
The resurgence of Disco Ball Planters is not just a passing trend but a reflection of how nostalgic elements can be reimagined in modern contexts.
These planters offer a unique way to blend the old with the new, creating spaces that are both vibrant and comforting.
We'd love to hear from you. Have you integrated a Disco Ball Planter into your home? Do you have any creative uses or placement ideas for these decorative pieces?


